Greetings from planet Earth. In this series of posts, I will share with you the progress I have made with the AstroPi project. Yeah, that's what I'm calling it as of now.

The AstroPi Logo.
What's the big idea?
Legendary astrophotographers have proved that even webcams can be used to capture some stunning astrophotography. However, I've only seen planetary images (do tell me if you find any DSOs!).
I've been doing phone astrophotography for quite a while, now, and it really goes to show how powerful today's camera sensors are, despite their size. Feel free to check out the "Astro" section of this site! As of today, all of the images posted there have been captured using a phone camera or similar sensor.
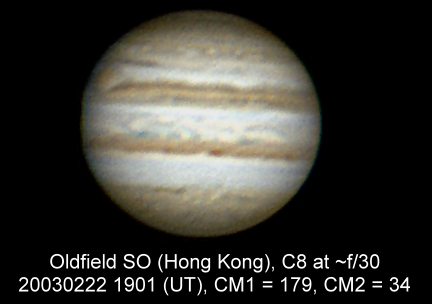
Credit: This CN Post
Long story short, I want to take it to the next level by using a Raspberry Pi HQ Camera. I also plan to write my own control software in python.
How?!
Basically, an M12-to-1.25" adapter will be used to connect the HQ camera to the telescope's focuser. The camera will, of course, will be controlled using a Raspberry Pi 5. To control things, a Flask server will be hosted on the Raspberry Pi, which hosts HTML pages. That's the idea.

A cheap M12-to-1.25" adapter.
I haven't yet decided what I'm going to do about the casing, but I guess I won't be worrying about that just yet. For now, I'm going for a random plastic box that happened to be lying around.
Parts
Not much is required to build your own AstroPi (subject to change once I add a cooling system!). Just a Raspberry Pi, and the HQ Camera.
Build
WIP